Why Surface Preparation Tools Are Important in Stone and Concrete Work
Surface preparation tools play a bigger role in stone and concrete work than many people realize. The final surface may be polished, coated, sealed, restored, or installed over, but the quality of that final result often depends on what happens before the visible finish is applied. If the base surface is uneven, dusty, contaminated, too smooth, too rough, or poorly ground, the next process becomes harder to control.
This is true across many parts of the market. Stone restoration teams, concrete flooring contractors, fabrication shops, renovation companies, and coating installers all deal with surfaces that need to be prepared correctly. In some cases, preparation is about removing old material. In others, it is about leveling, smoothing, opening the surface, or creating the right texture for adhesion.
Why Surface Preparation Decides the Quality of the Final Work
Surface preparation is usually not the part of the job that customers notice first. They see the polished stone, the coated floor, the repaired slab, or the finished installation. But when preparation is skipped or done poorly, the problems show up later.
A coating may peel. A polished surface may reveal scratches. A repaired area may fail to bond properly. A stone surface may look uneven under light. In concrete work, a floor can appear clean while still having weak laitance, old adhesive, oil residue, or a surface profile that does not match the coating system.
That is why surface preparation tools should be viewed as part of quality control, not just jobsite accessories. They help create the correct base condition before finishing work begins.
Where These Tools Are Used in the Market
The demand for preparation equipment is not limited to one trade. Different contractors use similar processes for different outcomes. A stone shop may grind before polishing. A flooring contractor may grind before epoxy. A restoration team may remove a damaged surface layer before honing. A renovation crew may remove adhesive before installing a new floor system.
- Removing old coatings, sealers, paint, or adhesive residue
- Flattening uneven concrete before flooring installation
- Grinding natural stone before honing or polishing
- Opening concrete pores before epoxy or overlay application
- Restoring worn marble, granite, terrazzo, or limestone
- Preparing commercial floors for repair, coating, or resurfacing
The same basic idea applies across these jobs: the next step is only as reliable as the prepared surface underneath it.
Stone and Concrete Have Different Preparation Needs
Stone and concrete are both hard materials, but they do not behave the same way. Natural stone work often requires controlled grinding and refinement because the final appearance matters. Concrete work may require more aggressive preparation, especially when removing old coatings or creating a profile for adhesion.
| Material or Work Type | Common Preparation Goal | Tool Consideration |
|---|---|---|
| Natural stone | Smoothing before polishing | Use controlled stone grinding tools to avoid overcutting |
| Concrete floor | Creating surface profile | Match grinding method to coating or overlay requirements |
| Countertop edge | Shaping and refinement | Use a consistent grit sequence for clean finishing |
| Renovation surface | Removing old layers | Choose aggressive tooling without damaging the base |
| Decorative concrete | Improving finish consistency | Avoid uneven grinding marks before final treatment |
This is where tool selection becomes important. A setup that works well for rough concrete removal may not be suitable for marble restoration. A tool used for fast removal may leave marks that require additional correction before polishing.
The Role of Grinding Before Polishing, Coating, or Restoration
Grinding is often the step that turns an unpredictable surface into a workable one. It can remove high spots, old residue, shallow scratches, weak layers, or uneven material. Before polishing, grinding helps establish a consistent base. Before coating, it can help create a surface that allows better bonding. Before restoration, it may remove the worn or damaged layer so the surface can be rebuilt through finer steps.
Tool choice affects the result. Contractors comparing options often review different grinding tools for stone and concrete surfaces based on material hardness, surface condition, machine type, and the finish required after grinding.
This is also where diamond grinding tools are widely used. Stone and concrete are dense, abrasive materials, so ordinary abrasives may wear quickly or produce inconsistent results. Diamond segments can improve removal speed and durability, but they still need to be matched to the job.
How Diamond Grinding Tools Affect Speed and Finish Quality
The same grinding tool will not perform equally on every surface. Bond hardness, segment shape, grit level, machine weight, and grinding speed all affect the outcome. An aggressive tool may remove material quickly, but it can also leave deeper marks. A finer tool may produce a cleaner surface, but it may not remove coatings or high spots efficiently.
Before choosing diamond grinding tools, contractors usually need to consider:
- Material hardness and abrasiveness
- Whether the job requires removal, leveling, or refinement
- Wet grinding versus dry grinding conditions
- Machine speed, weight, and operator control
- Expected surface quality before the next process
- Tool life, replacement cost, and rework risk
The best tool is not always the most aggressive one. In many stone and flooring jobs, controlled removal is more valuable than fast removal because it reduces the chance of damaging the surface.
Why a Grinding Cup Is Not Always Interchangeable
A grinding cup may look like a simple accessory, but different cup wheels are designed for different types of work. Some are built for fast concrete removal. Others are better for smoothing, edge work, or more controlled grinding. Segment layout, rim design, and bond type all affect how the tool cuts.
Using the wrong grinding cup can create swirl marks, excessive heat, chipped edges, or uneven surface removal. On softer stone, aggressive cups may remove too much material too quickly. On hard concrete, a tool that is too fine may glaze over or work too slowly.
This is why experienced operators rarely choose tooling by appearance alone. They consider the surface, the next step, and the level of correction required.
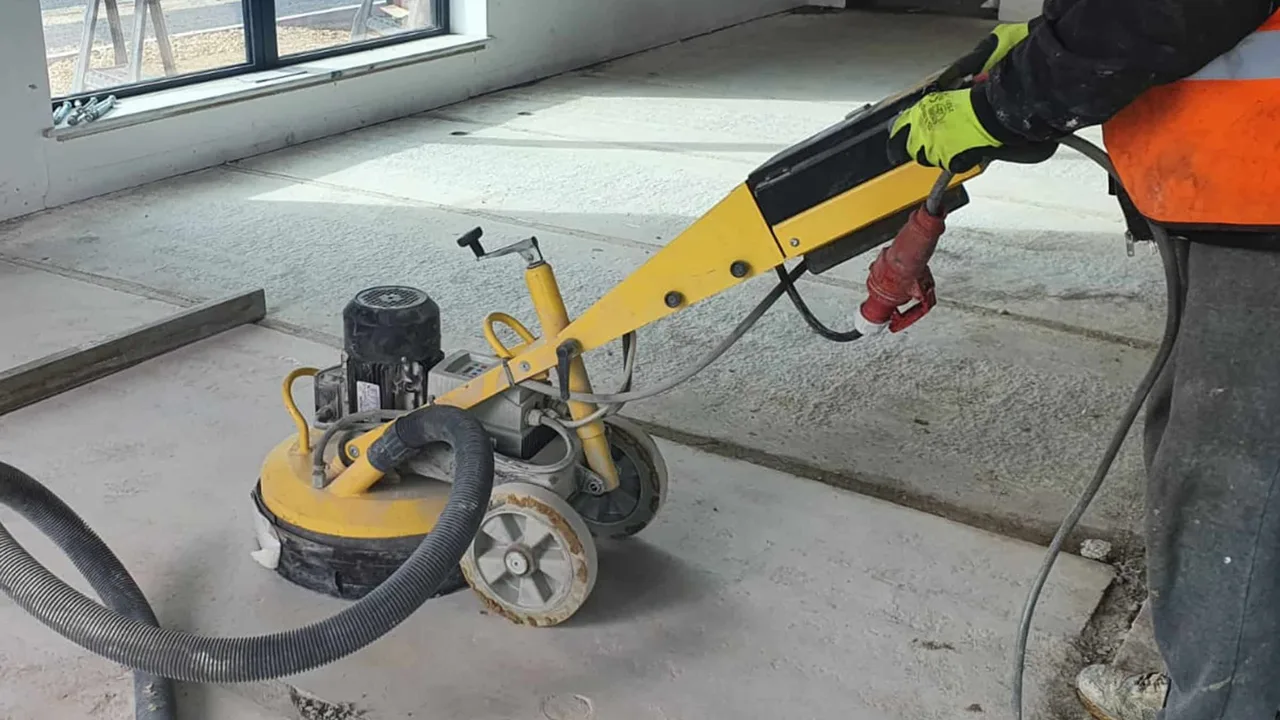
Concrete Surface Prep Before Coatings and Overlays
Concrete surface prep is especially important before epoxy, sealers, overlays, repair mortars, or decorative systems. Coatings do not only need a floor that looks clean. They need a surface that is clean, sound, dry enough for the system, and profiled correctly for adhesion.
In practical terms, preparation may involve grinding, shot blasting, crack repair, vacuuming, degreasing, or removing old coatings. Contractors often refer to surface profile requirements before applying coatings, and resources such as Concrete Network’s surface preparation guide explain why different finishes and overlays may require different levels of preparation.
If the surface profile is wrong, the coating may fail even if the material itself is good. That is one reason floor failures are often traced back to preparation rather than the final product.
Floor Preparation Is About More Than Cleaning
Floor preparation is sometimes misunderstood as basic cleaning. In reality, a floor can be swept, washed, and still be unprepared. Old glue, sealers, curing compounds, paint, grease, laitance, and weak top layers can prevent proper bonding or create uneven finishing.
A simple checklist can help contractors decide whether the surface is ready:
- Is the floor structurally sound?
- Are old coatings or adhesives fully removed?
- Does the profile match the next material or finish?
- Has grinding dust been removed before coating or polishing?
- Are cracks, weak spots, or spalled areas repaired?
For commercial spaces, warehouses, showrooms, kitchens, and industrial floors, preparation can directly affect service life. A rushed prep job may save a few hours at the start but create callbacks later.
Surface Preparation in Stone Restoration Projects
Stone restoration has a different rhythm from concrete preparation. The work is often less about aggressive removal and more about controlled refinement. Marble, granite, terrazzo, limestone, and engineered stone may require grinding, honing, and polishing in a planned sequence.
In restoration, stone grinding tools are used to correct wear, scratches, etching, unevenness, or surface damage before finer abrasives bring back the desired finish. The goal is not always to remove as much material as possible. Often, the goal is to remove only what is necessary while keeping the surface flat and consistent.
Poor tool selection can create visible scratch patterns or uneven gloss. This becomes especially obvious under natural light or in large open areas where reflection shows surface variation.
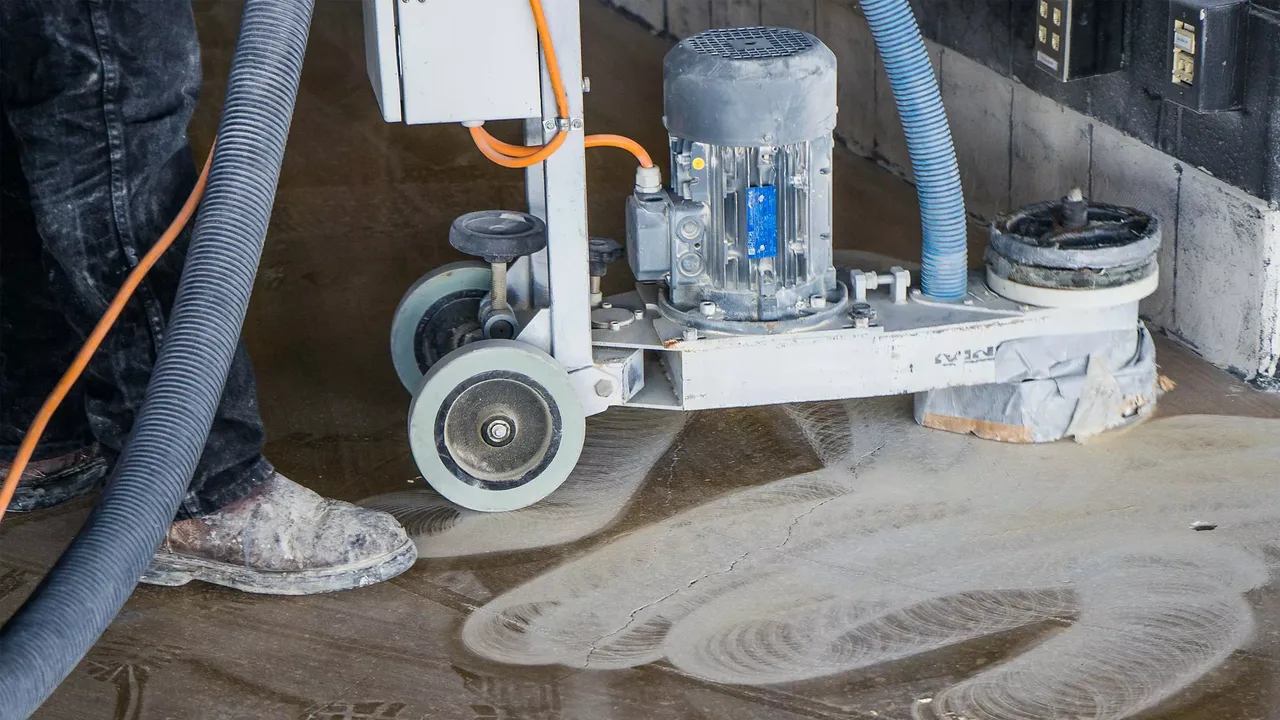
Safety, Dust, and Water Control in Grinding Work
Grinding stone and concrete can produce dust, slurry, noise, flying particles, and jobsite hazards. Wet grinding can help reduce airborne dust but creates water and slurry management issues. Dry grinding can be efficient, but it usually requires dust extraction and personal protective equipment.
Silica exposure is also a serious concern when grinding materials that contain crystalline silica. OSHA provides construction guidance on respirable crystalline silica, including control methods and compliance expectations for tasks that generate dust. Contractors can review OSHA’s crystalline silica construction guidance when planning safer grinding practices.
- Use dust extraction or wet methods where appropriate
- Plan slurry cleanup before work begins
- Protect eyes, hearing, and respiratory health
- Route cables and hoses away from walking paths
- Check machine guards and tooling before operation
- Keep the work area controlled when grinding near other trades
Safety planning is not separate from productivity. A cleaner, better-controlled jobsite usually supports more consistent work and fewer interruptions.
How Contractors Choose the Right Surface Preparation Tools
The right tool depends on the job outcome. A contractor preparing concrete for coating may choose differently from a stone worker preparing marble for polishing. The surface condition, material hardness, machine type, and next process all matter.
| Job Goal | Typical Tool Direction | Main Risk If Wrong |
|---|---|---|
| Remove coating | Aggressive diamond segments | Gouging or uneven removal |
| Prepare concrete for coating | Profile-focused grinding | Weak adhesion |
| Restore stone | Progressive grinding and honing | Visible scratches or uneven gloss |
| Level high spots | Durable grinding cup tooling | Over-removal |
| Prepare floor before finish | Balanced removal and cleaning | Coating or finish failure |
Good selection usually starts by asking what the surface must become, not simply what material needs to be removed.
Cost, Productivity, and Tool Life Considerations
Tool cost should be evaluated through the full job, not only the unit price. A low-cost tool may wear quickly, cut slowly, or create scratches that require extra correction. A premium tool may also be wasteful if it is mismatched to the material or machine.
Contractors often compare real cost through factors such as grinding speed, surface quality, replacement frequency, operator fatigue, and rework. If a tool reduces labor time and avoids correction work, it may be more economical even if the purchase price is higher.
This is especially important when surface preparation tools are used regularly across commercial flooring, stone restoration, or renovation projects. Over multiple jobs, small differences in tool life and finish quality can affect margins.
Common Mistakes in Surface Preparation
Many preparation problems are avoidable. They happen because teams rush the first step or assume one method works for every material.
- Skipping preparation because the surface looks clean: appearance does not confirm adhesion readiness.
- Using one tool for every surface: concrete, granite, marble, and terrazzo may need different approaches.
- Grinding too aggressively before polishing: deep marks can require extra steps to remove.
- Ignoring dust or slurry control: cleanup affects safety, visibility, and the next process.
- Not matching profile to coating needs: the coating may fail even if the product is high quality.
- Breaking the grit sequence: skipped steps can leave scratches that show in the final finish.
A disciplined preparation process helps reduce these risks before they become expensive problems.
A Practical Checklist Before Starting Surface Prep Work
Before starting a grinding or preparation job, contractors should confirm the surface goal and the next step in the workflow. The same floor may be prepared differently depending on whether it will be polished, coated, repaired, restored, or covered with another material.
- What is the final process: polishing, coating, installation, repair, or restoration?
- What material is being prepared?
- Is the goal to remove, level, roughen, smooth, or refine?
- What machine will be used?
- Is wet or dry grinding more suitable for the jobsite?
- What dust or slurry controls are required?
- What grit or tool sequence is needed?
- How will the surface be inspected before the next step?
Reliable preparation reduces surprises later. Whether the project involves stone restoration, concrete surface prep, coating work, or floor preparation, the right tools help contractors build a better result from the first stage of the job.